4 Way Switch Light Wiring Diagram
4 Way Switch Wiring Electrical 101

Stunning 4 Way Switch Wiring Diagrams Light In The Middle S
4 Way Switches Electrical 101
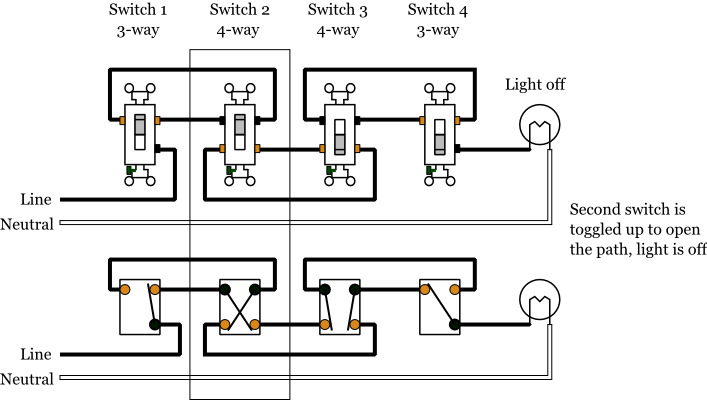
The 4 way is used when you want to control the light or lights from two or more locations.
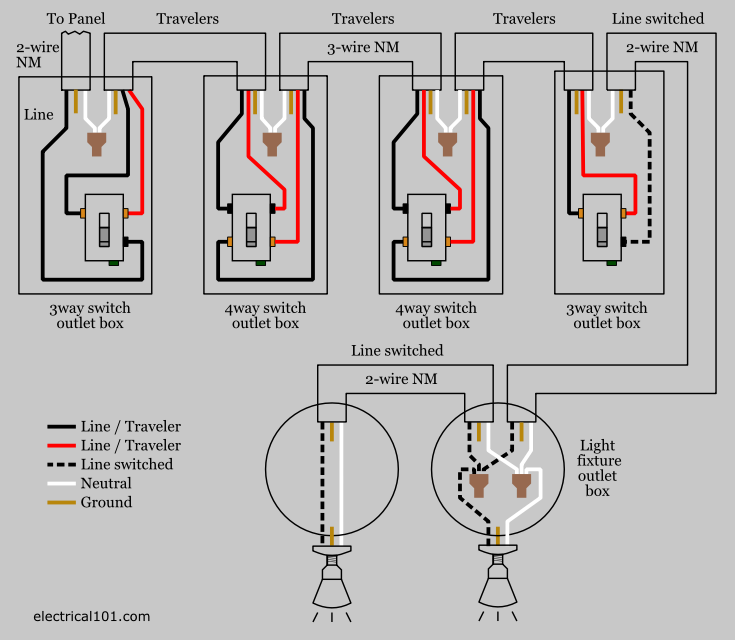
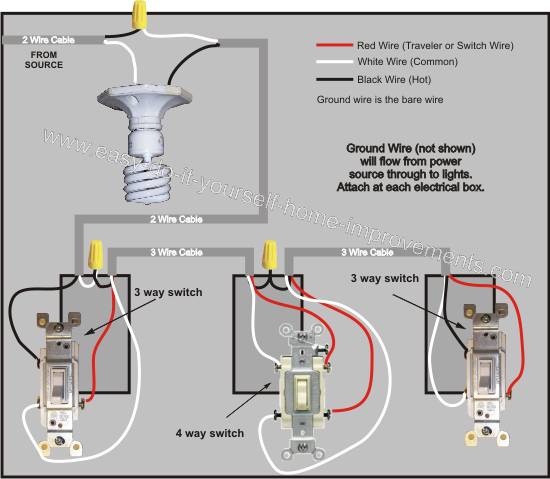
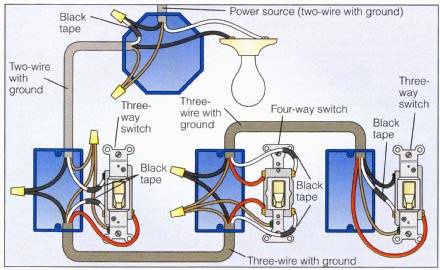
4 way switch light wiring diagram. To view it at full size click on the diagram. A 3 way switch has three screws plus the green grounding screw. Wiring a 4 way switch with light at the end. To switch from three or more locations you will need to add 4 way switches.
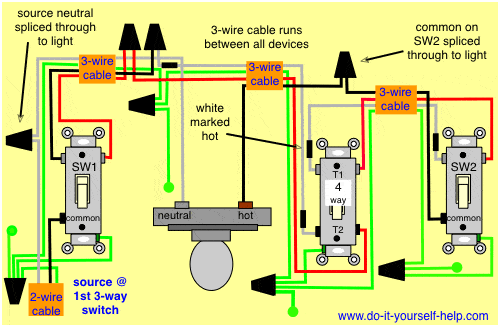
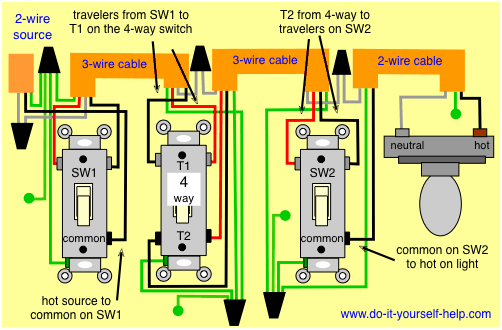
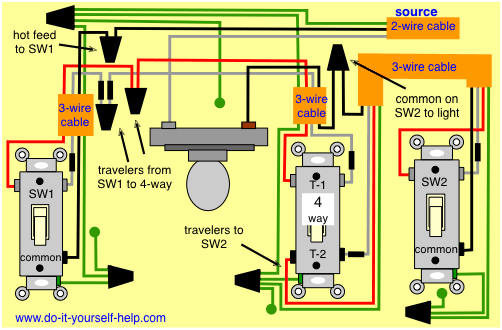
The white wire becomes the energized switch leg as indicated by using black or red electrical tape. More about wiring a 4way switch. This 4 way switch diagram 2 shows the power source starting at the fixture. For circuits that control lights from two locations only check the wiring diagrams at this link.
In this basic 4 way light circuit 3 wire cable runs between all the switches and 2 wire cable runs from the last switch to the light. 4 way switch wire colorsthere is no standard for wire colors on 3 and 4 way switch travelersthe colors will vary depending on whether nm cable or conduit was used. For complete instructions on wiring a basic 4 way switch see our wiring a 4 way switch article. How to wire a 4 way switch.
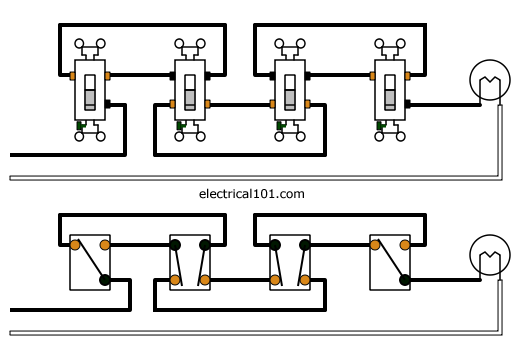
The diagrams on this page illustrate connecting multiple lights in 3 way and 4 way switch circuits. The most important screw is the black one continuous hot and light feed wire goes on black screw traveler wires go on the brass screws 143 with ground or 123 with ground wire best to use between switches watch all videos below for. 4 way switch wiring comes in real handy when you would like to control a light fixture from more than two locations. A 4 way switch wiring diagram is the clearest and easiest way to wire that pesky 4 way switch.
I have a few of the most common ways in wiring a 4 way switch to help you with your basic home wiring projects. Wiring a 3 way switch with multiple lights. Click here to access note. When you want to switch electrical devices lights or other outlets on or off from two locations you use a pair of 3 way switches.
The white wire of the cable going to the switch is attached to the black line in the fixture box using a wirenut. Check below for more details about these circuits and some troubleshooting tips.
4 Way Switch Wiring Diagrams Do It Yourself Help Com
4 Way Switch Wiring Diagram
4 Way Switch Wiring Diagrams Do It Yourself Help Com

4 Way Switch Wiring Diagram Light First Electrical Wiring

4 Way Switches Electrical 101

4 Way Switch Wiring Help Line And Load In Same Box

4 Way Switch Wiring Diagram Recipes In 2019 Home

4 Way Switches Electrical 101
4 Way Switch Wiring Diagrams Do It Yourself Help Com

How Can I Eliminate Some Of The Switches In A 4 Way Circuit
4 Way Switches Electrical 101

Help With Wiring 4 Way Ge Jasco Light Switches Connected

4 Way Switch With Power Feed Via The Light Switch How To

Wiring Diagram Multiple 4 Way Switches In 2019 Light
Wiring A 4 Way Switch

Travelers How To Wire A Light Switch

Basic 4 Way Switch Wiring Electrical Online

3 Way And 4 Way Switch Wiring For Residential Lighting
