Overhead Door Sensor Wiring
Garage Door Sensor Problems Garage Doors Doors Repair
Garage Door Sensors Overhead Door Opener Sensor

Garage Door Sensor Wire Openers Sensors Craftsman Opener

Variety of garage door sensor wiring diagram.
Overhead door sensor wiring. The sensors are located above the. Includes 2 pigtails with 1 foot of wire each. The bottom sensing edge stops and reverses the door upon contact with an obstruction. Late 1995 1996 for photocell safe t beam.
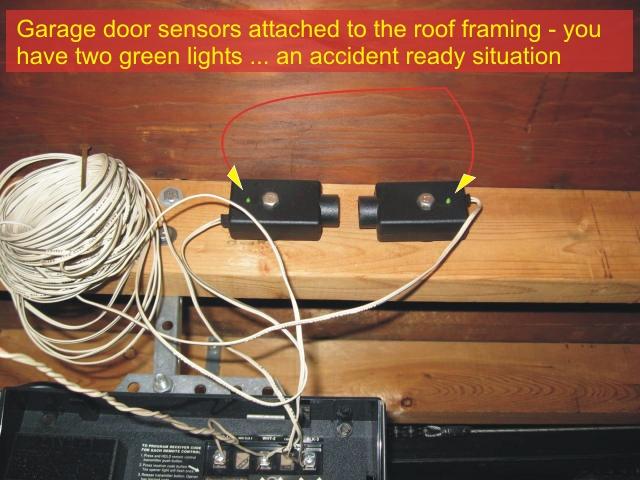
Sensing edges provide entrapment protection for motor operated doors by offering an auto reverse or auto stop feature. For use with pre series ii 2 conductor clip in style photocells. You can see how the wires are captured by the two metal blades that pierce the wire insulation. Garage door openers include a photo electric sensor system to help prevent damage to the door or opener.
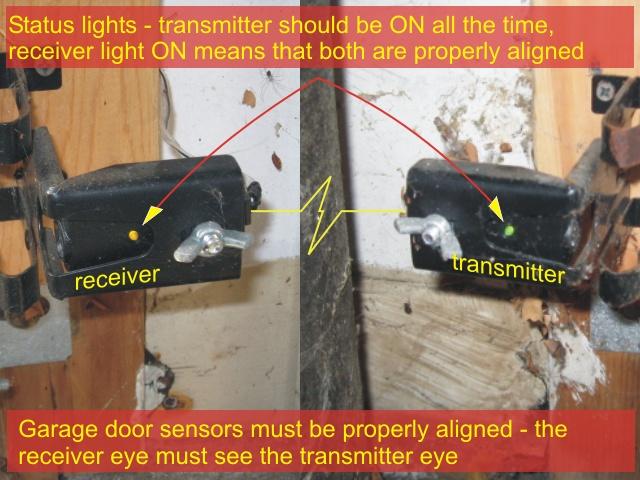
Overhead door and genie openers. Garage door sensor wire repair. If the garage door closes it indicates that the sensors are not functioning. Wiring a sensor for a genie garage door opener is much like any other opener.
In this case check the alignment of the opener or better involve a technician. You can choose to press the close button located on the wall of the garage or the remote button. It reveals the elements of the circuit as streamlined shapes as well as the power and signal connections in between the devices. A wiring diagram is a simplified conventional pictorial representation of an electrical circuit.
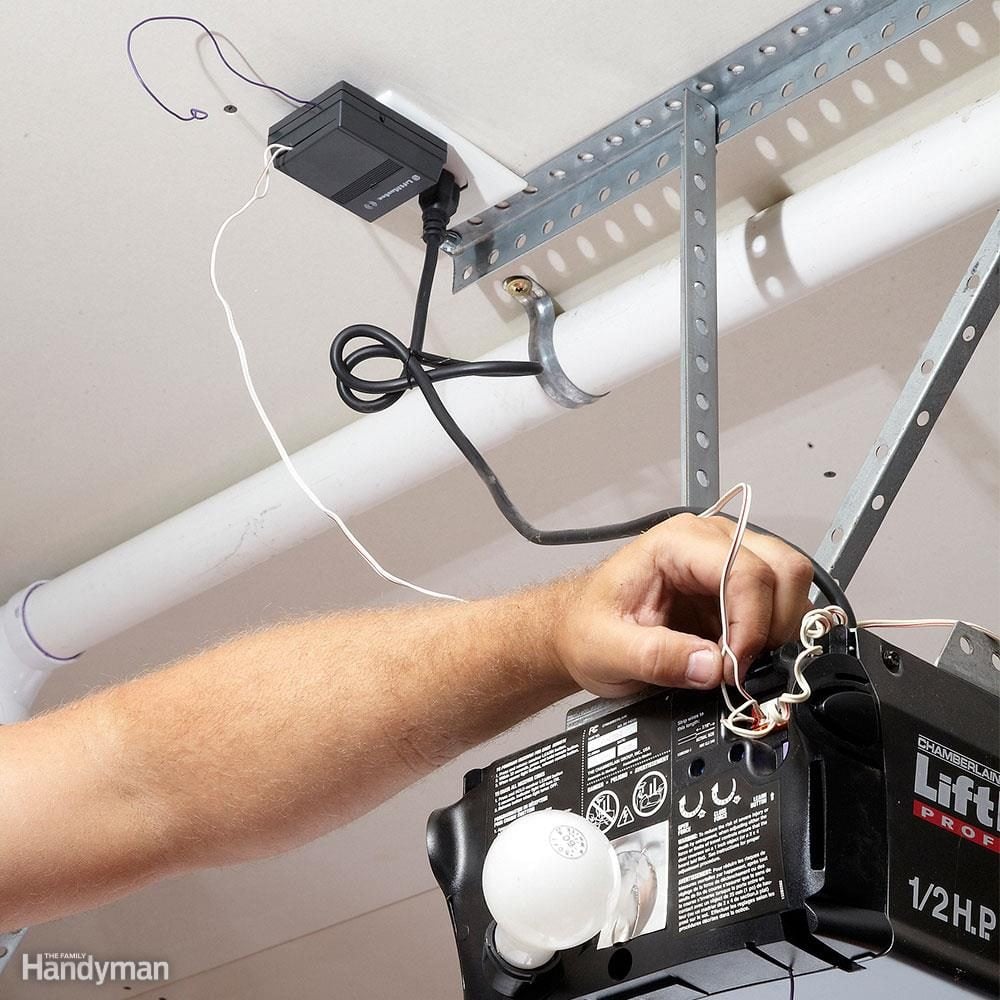
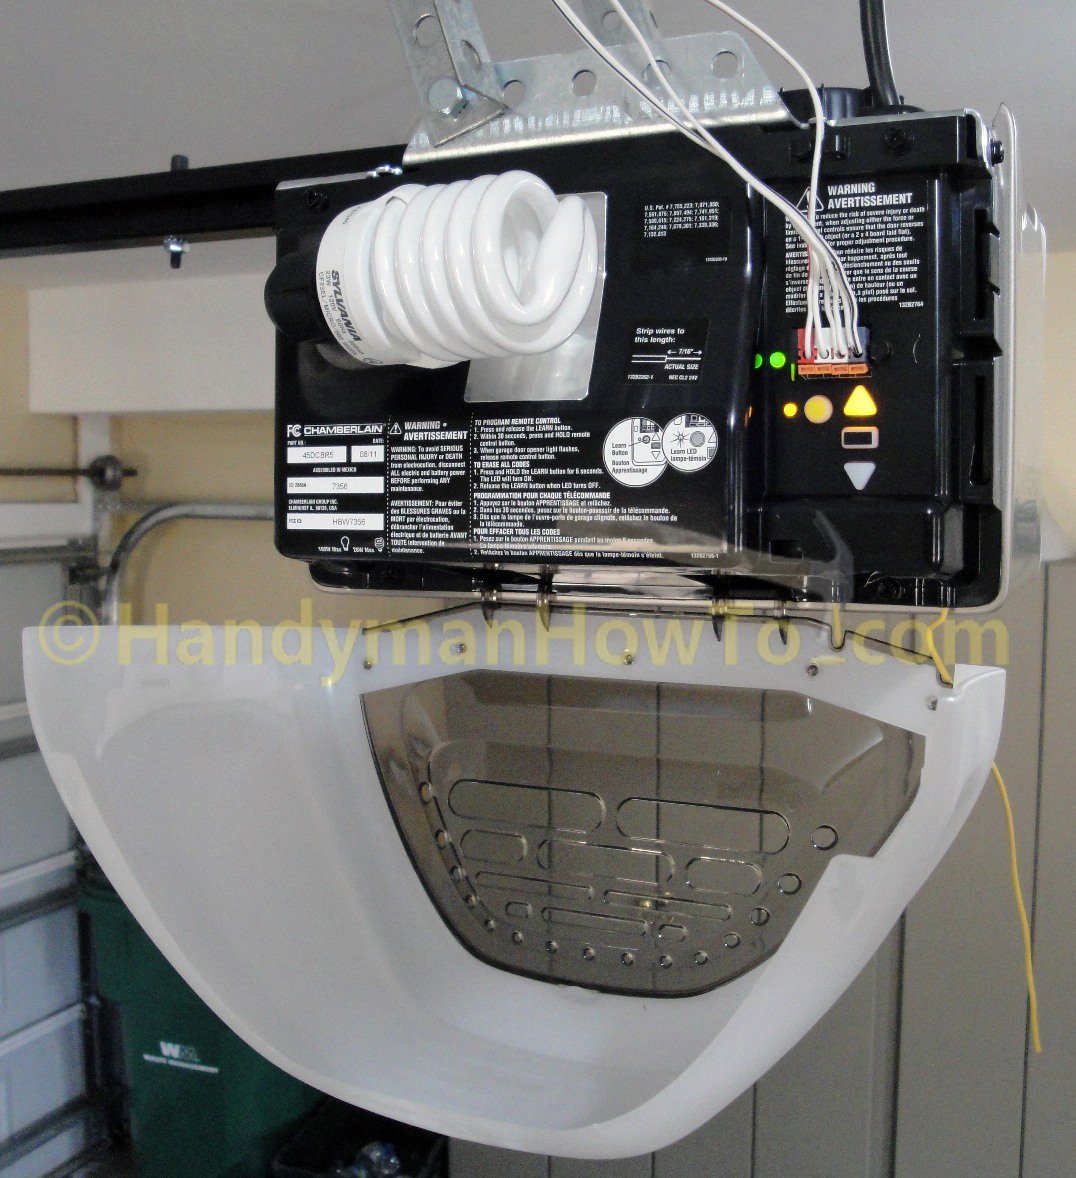
If you read the simple instructions and have a couple of phillips head screwdrivers it is a pass through operation. I did not even have to re aline the beam after installing the brackets. Order overhead door replacement parts including remote controls keypads circuit boards safety sensors wall consoles and all other accessories. Ensure that the door is open and activate the opener.
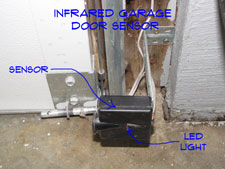
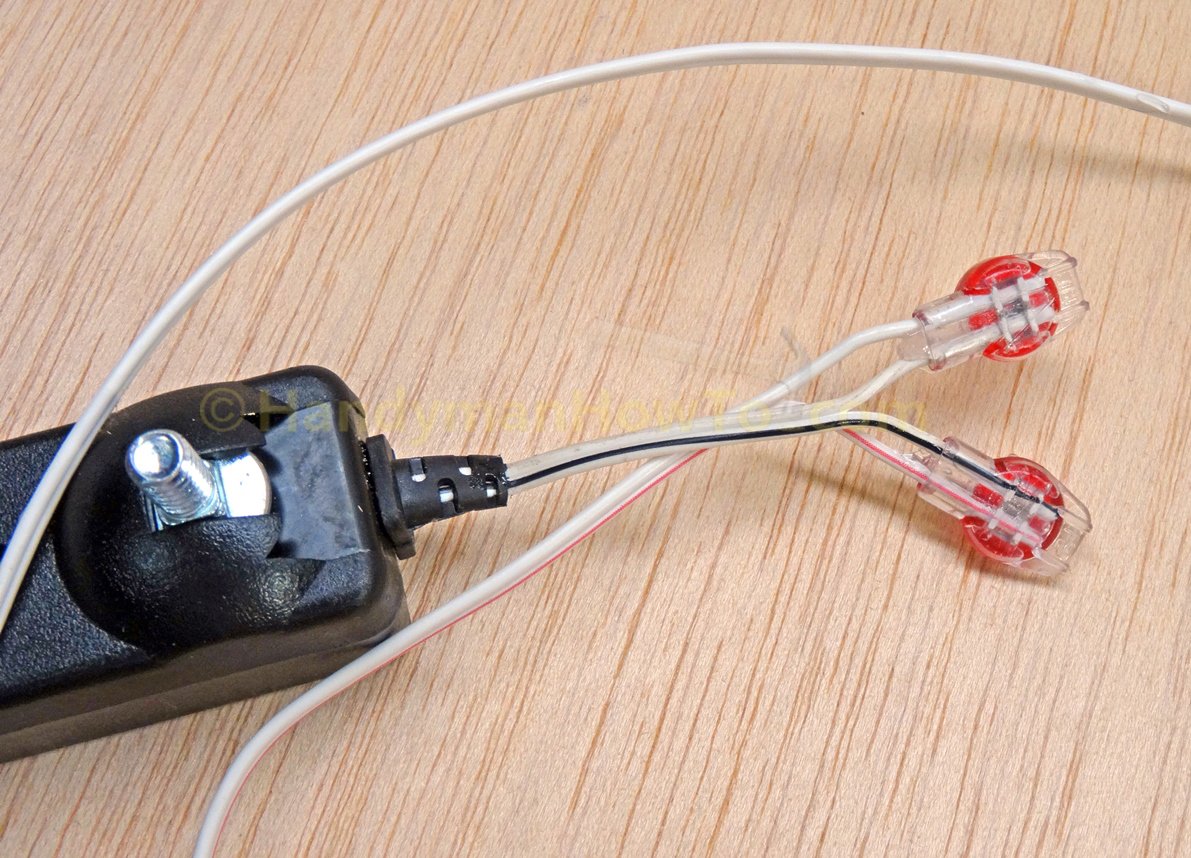
The butt splice connectors make for a professional looking job. The sensor emits an infrared beam that when broken causes the opener to stop closing the door and reverses the movement back to the open position.

How To Repair Garage Door Safety Sensor Wires

Replacing The Safety Sensors On A Garage Door Opener

How To Repair Garage Door Safety Sensor Wires
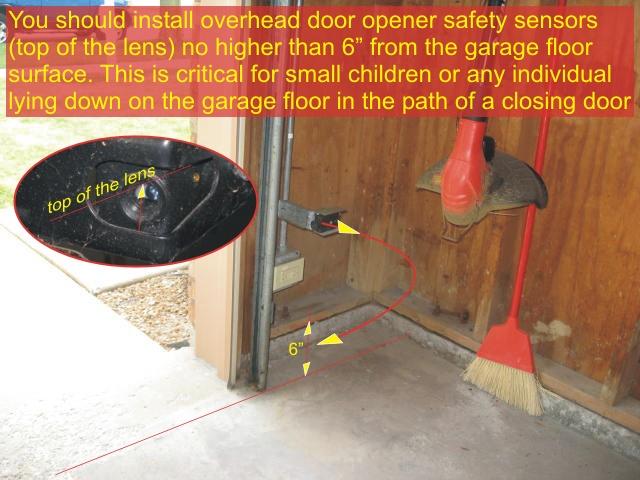
How To Install Garage Door Safety Sensors Correctly
Garage Door Sensors Overhead Door Opener Sensor

Wiring For Garage Door Opener Maylanhcu Co

Genie Sensor Wiring Wiring Schematic Diagram
How To Repair Garage Door Safety Sensor Wires

How To Install Garage Door Safety Sensor Sun Shield

How To Wire Chamberlain Garage Door Opener Medicalcureusa Co
Do Your Own Garage Door Opener Repair And Troubleshooting

Garage Door Photo Eye Wiring Diagram Sofa Idea
Garage Door Sensors Overhead Door Opener Sensor

Liftmaster Garage Door Opener Sensor Wiring Liftmaster
How To Repair Garage Door Safety Sensor Wires
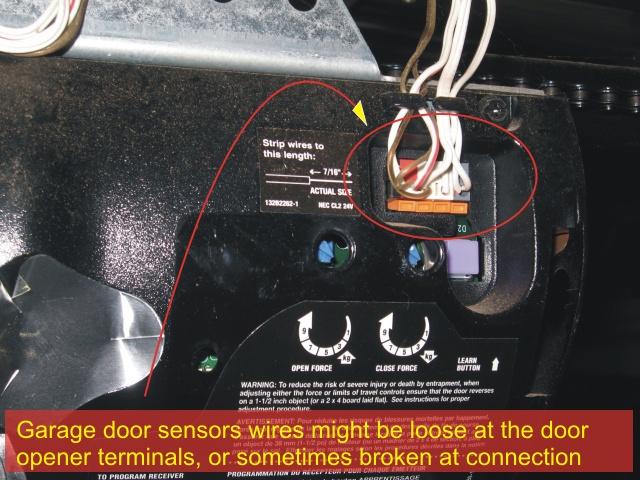
Garage Door Sensors Overhead Door Opener Sensor

Impressive Garage Door Wiring Diagram 8 Garage Door Opener

Garage Door Opener Electric Eye
